

Free online invoicing software
with KSeF support
This guide walks through issuing an advance invoice in the IK+ system, from creating a pro forma invoice to saving the final document. Check all details before locking the pro forma, as it can no longer be edited after that step.
Step 1: Create a pro forma invoice
Enter all required information as you would for a standard invoice or pro forma. Check that the customer details, amounts and other information are complete, then save the pro forma in IK+.
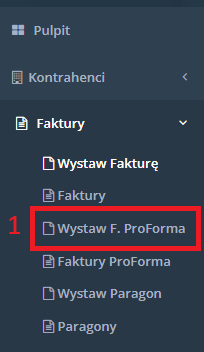
Review the saved document before continuing.
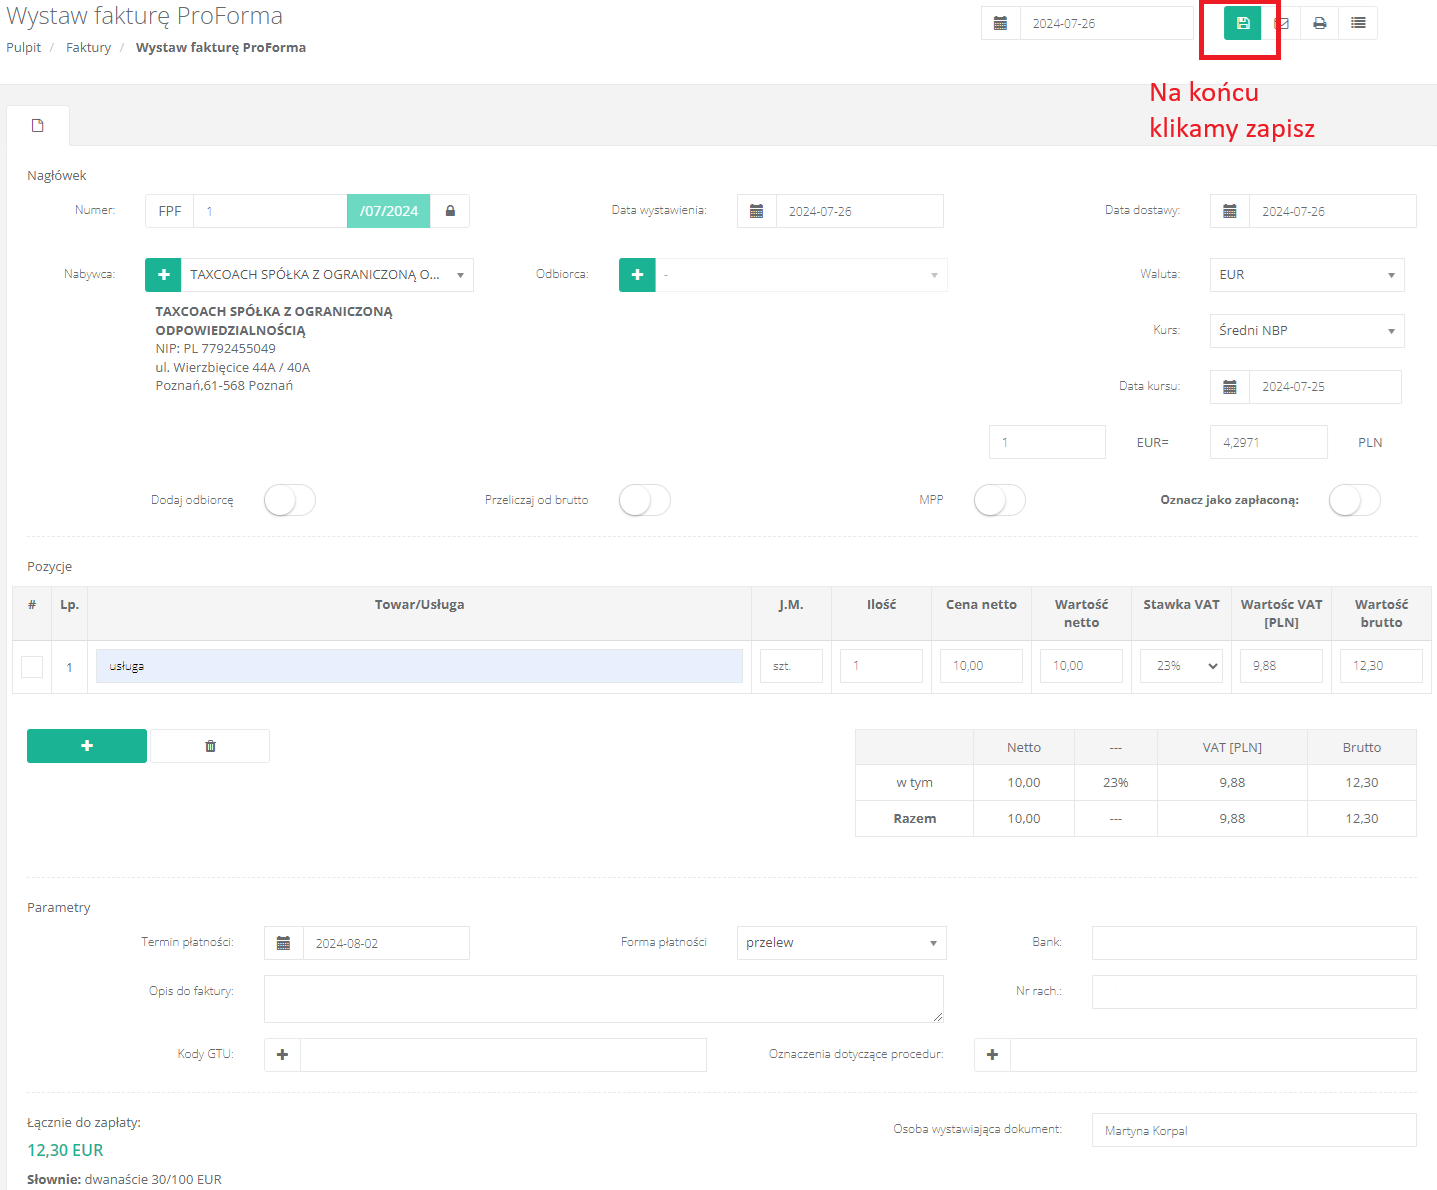

Accounting that understands your business
Leave your email address to receive weekly guides to help your business grow.

Step 2: Convert the pro forma into an advance invoice
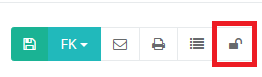
- Open the saved pro forma for editing.
- Click the padlock icon to lock it. This prevents further edits and enables conversion.
Click the “ZL” icon to issue an advance invoice.
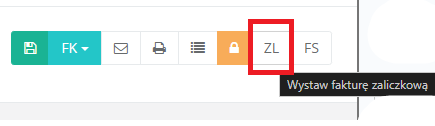
IK+ converts the pro forma into an advance invoice. Enter the advance payment received in the relevant field.
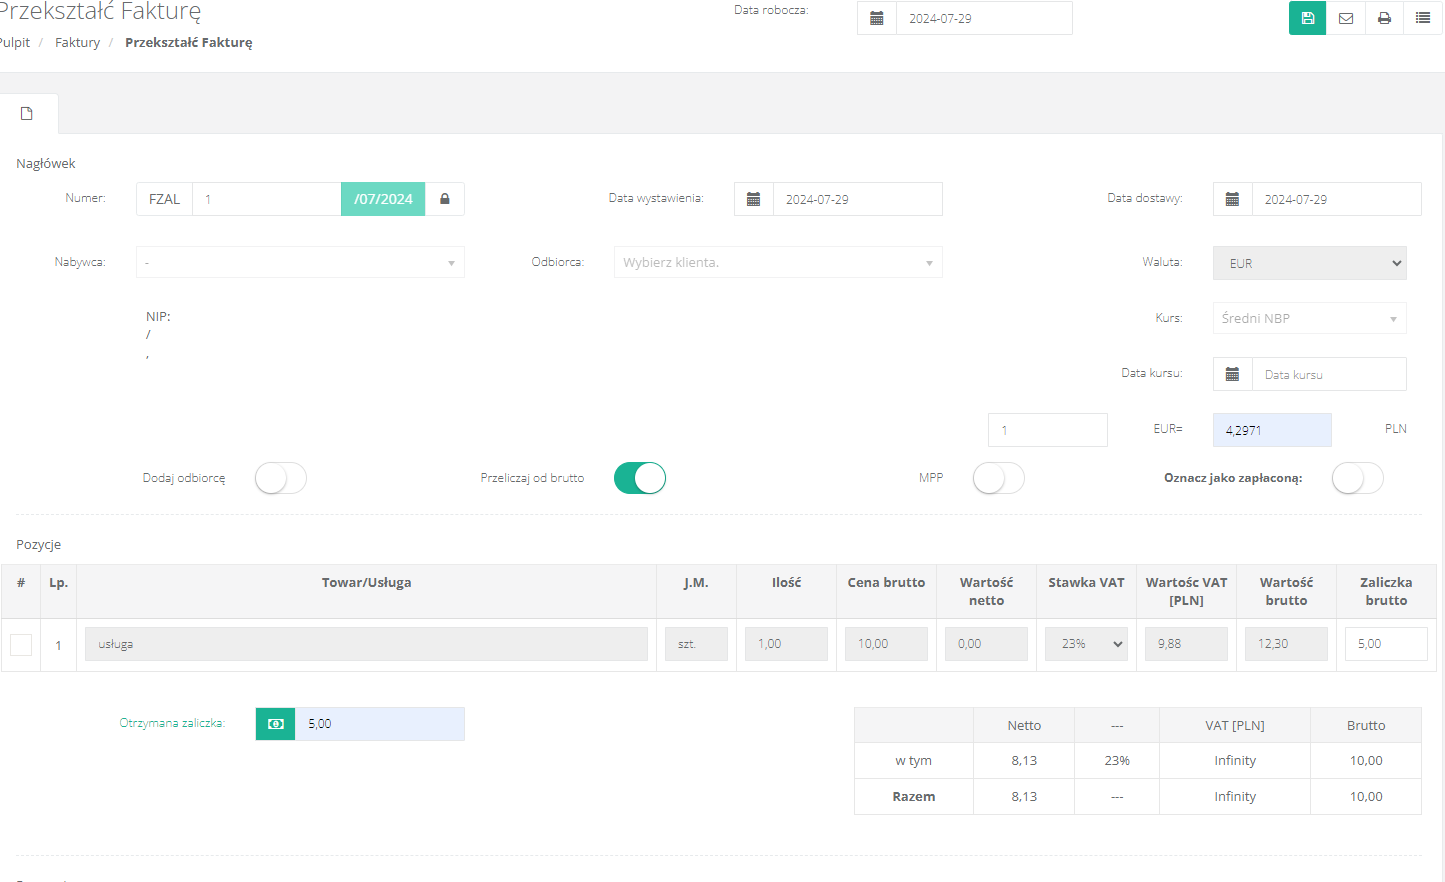
Step 3: Save the advance invoice
After entering the advance amount, save the invoice. You can then download, print or save the document to your computer.
Need help with your invoicing and accounting? Explore our accounting services:
Summary
The IK+ workflow has three main stages: prepare a pro forma, lock and convert it, and record the advance received. Verify the data before locking because a locked pro forma cannot be edited. The resulting advance invoice can then be saved or printed.

Interested in this article?
Enter your email address and once a week you will receive practical materials and tips to help you grow your business.

Book a free consultation
Grow your business with accounting combined with advisory support:

or